It's Turkey Time!

I'll let you in on a little secret... you can have turkey time other than Thanksgiving and Christmas! In fact, one of my budgeting secrets is to buy a turkey right after Christmas when the stores have a surplus and they reduce prices drastically. If you have freezer space buy a few! Even if you aren't a fan of the traditional turkey dinner, the leftovers are awesome! I make enchiladas, pot pie, soup, hot turkey sandwiches, and a few other things, many of which will me mentioned in upcoming blog entries so keep an eye out.
Another secret... turkeys are not really that difficult. The main issue people have is not giving themselves enough time to let the turkey defrost and properly roast. Turkeys can take a few days to defrost in the refrigerator - which is the method I recommend. Caution: properly handled turkey is a major food poisoning danger! Believe me... I know... unfortunately. Never let a turkey raw or cooked sit out on the counter. Get leftover put away in the fridges right away or freeze them if you aren't going to use them right away.
So... after that warning, here are my secrets to a delicious turkey!
Defrost:
Leave turkey in your refrigerator, in a pan or dish to catch any dripping, until it is thawed. Keep it on a low shelf without food under it, just in case it springs a leak!
Make rub or topping:
Roast Turkey Rub
Hint: This is equally delicious on chicken.Ingredients:
- 1/4 cup olive oil
- 2 tsp. poultry seasoning
- 1 tsp turmeric (gives the bird a wonderful color)
- 1 tsp paprika
- 4 cloves garlic, roughly chopped
- 1/2 Tbsp rosemary
- 1/2 Tbsp thyme
- Mix in a small bowl.
- Ha! That was easy!
Prepare the bird:

- Clean your sink!
- Preheat your oven to 425.
- Remove the turkey from packaging, let the juices drain, remove giblets, liver and neck (these are usually stuffed in either end of the bird. Discard or use for your gravy. I do not use them but some I know boil the neck down for a nice stock for the gravy. Look elsewhere for directions.
- Rinse the turkey thoroughly inside and out, checking for bad spots.
- Remove from sink and place in broiling pan.
- Loosen the skin. Remove your rings first. I usually start at the neck and work my hands up over the breast, then down the legs and the backside. (Sounds kinds dirty... haha!) You will have to break through some areas with your fingers. It will look a little saggy when done and you should be able to lift the skin from the breast clean away.


- Give your bird a massage under the skin with your special rub! Really work it in. It's the least you can do for the bird who worked so hard to become your dinner! Get those muscles. My rub will be thick so I grab a clump at a time and use that hand to rub. Your hands will be gross and covered with rub. The turmeric will turn them orange, don't worry it will wash off!

- Tuck skin back around, don't worry too much about rips just try to cover the meat with the skin. Your skin will be your roasting bag.
- Twist the wings around and push the tips under your turkey.
- Wash your hands.


Cooking the bird:
- Place turkey in the preheated oven (425). Make sure it isn't touching the top or sides!
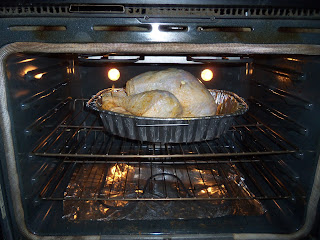
- Keep an eye on the turkey and when it is lightly browned turn the heat down to 325. Time to let it roast.

- Depending on the size the turkey can take quite a while. Get an early start. Mine is 15 pounds and I expect it to take about 5 hours. Count on 20 minutes a pound and then give yourself some wiggle room. Turkeys take time. Too hot and fast and they will be dry and gross!
- Every once in a while check on your turkey. If it is browning too fast or the skin is burning, tent it with aluminum foil, this means taking a few sheets of foil and draping them over the bird to protect the skin.

- Baste it either in it's own juices, with melted butter, olive oil, or another batch of the rub from inside. Use a brush or a baster.

- When it is finished let it sit for up to an hour so that the juices settle.
- Carve and serve!
- Enjoy!


